Navigating in Jetpack Compose
If you are working on a mobile app, chances are you need some form of navigation. Getting navigation right isn’t easy with many challenges at hand: back stack handling, lifecycles, state saving and restoration and deep linking are just some of them. In this post, we’ll explore the Navigation component’s support for Jetpack Compose and take a look under the hood!

Getting started!
Before getting started, we’ll add a dependency on navigation-compose, the Navigation component’s artifact for Compose support.
Let’s jump into the code!
First, we create and memoize a NavController using the rememberNavController method. rememberNavController returns a NavHostController which is a subclass of NavController that offers some additional APIs that a NavHost can use. When referring to the NavController and using it later on, we will use it as NavController as we don’t need to know about these additional APIs ourselves; it’s just important for the NavHost.
We pass this into our NavHost composable. The NavHost composable is responsible for hosting the content of the NavDestination associated with the NavBackStackEntry (we will look at the details in a bit!).
The lambda we pass to the NavHost is the builder for our navigation graph. In here, we have access to a NavGraphBuilder and can construct and declare our navigation graph. This is where we declare our destinations and nested graphs. If you are coming from the “old” navigation library, this might feel a bit weird at first! There is no XML anymore, not even for the navigation graphs. Even though the Kotlin DSL has been available for a long time, it had been overshadowed by XML so far.
This also means that we won’t have a visual representation of the graph for the foreseeable future. The rendered view of the XML navigation graph was very useful, so let’s hope that we will get this for Compose at some point!
Declaring a composable destination is easy: We use the composable method provided by navigation-compose.
It is an extension function on NavGraphBuilder, essentially a convenience wrapper around NavGraphBuilder‘s addDestination method. In here, a NavDestination specific to the ComposeNavigator is created. ComposeNavigator is the Navigator responsible for handling the back stack and navigation of composables.
NavGraphBuilder is part of the common (non-compose-specific) navigation API and mainly offers a addDestination method that adds the destination to the nav graph.
Looking back at our code, we pass a route to that composable function, telling the NavGraphBuilder what route we want to use later to navigate to this destination. If you are coming from the “old” navigation library, a route is roughly the equivalent of defining an id for a destination. Starting with version 2.4.0 of the navigation library, the NavDestination‘s id is automatically set (and updated every time the route is updated) based on its route, so defining an id isn’t needed.
The last parameter of the composable function is a @Composable lambda which will be set as the destination’s content. When we navigate to this destination, the NavHost will host this composable.
In our @Composable lambda, we just host the FeedScreen composable. While you could theoretically declare all your content directly in the nav graph, please don’t do it. Things will get messy soon and cleaning up will be tedious!
Awesome! We have created our NavController, used the NavHost composable and the composable NavGraphBuilder function to create a composable destination and add it to the navigation graph. Let’s add a second destination and navigate!
Let’s take a look at what changed:
First, we added a new destination to the graph and added the AdoptionScreen composable. To navigate when a button in our FeedScreen is clicked we added the NavController to the FeedScreen‘s parameters. Finally, when the button is clicked we call NavController#navigate with the route of the destination we want to navigate to.
Interlude: Under the hood
If you are not into the specifics of how things work under the hood, feel free to skip ahead to the next section. This interlude provides a high-level overview that can be useful for your understanding of navigation-compose.
When we call navigate, the NavController figures out what it has to do to get us to that destination. First, it checks if there is a destination associated with the requested route and if it is in the navigation graph. We don’t want to navigate into the depths of interstellar space!
Note: when navigating with a route, this is treated as a deep link internally. That also means that you get deep linking for free if you are using the Navigation Kotlin DSL and registering destinations with routes instead of ids.
After the NavController is sure that the destination we want to navigate to exists, the NavController looks at all the navigation options (should the back stack be popped? Should the destination be launched single top?) and creates an NavBackStackEntry if the destination isn’t on the back stack yet (i.e. when we haven’t navigated to it before or popped it off) or retrieves the back stack entry for the destination if it is on the back stack. That might be the case when we have the following flow:

A back stack entry is created and added to the back stack for our “Feed” starting destination. When we navigate to the “Adoption” screen, a back stack entry is created for the adoption screen. When we navigate back to the “Feed”, we already have the “Feed” back stack entry on the back stack. Just like Fragments, Activities or other components we know in Android development, a NavBackStackEntry has a lifecycle so that a back stack entry can remain on the back stack while not being active, i.e. because it is not at the top of the back stack.
To navigate, the NavController looks at the requested NavDestination‘s Navigator. In our case, that is ComposeNavigator since we are navigating to a composable destination. The NavController calls the navigator‘s navigate function with the requested destination and navigation options which carries out the navigator‘s navigation logic, adding the back stack entry to its back stack if needed. Finally, the entry is also added to the NavController’s back stack. A navigator only has back stack entries that it knows how to handle (entries created from this navigator‘s destinations) while the NavController maintains the back stack for the whole graph. You can think of the NavController as “big boss” and the navigators as “small bosses”.
Additionally, the navigator (to be more precise, the navigator’s NavigatorState) moves the back stack entry to the RESUMED state as it is now ready to be displayed. The NavigatorState also moves the previous entry’s state to the CREATED state, indicating that it’s not active anymore.
Meanwhile, the NavHost composable looks at the ComposeNavigator‘s back stack which now has the added or updated NavBackStackEntry. It recomposes with the updated list of back stack entries and emits each back stack entries’ destination’s content (the @Composable lambda we passed in earlier) into the composition. In simple terms, it invokes the @Composable lambda that we passed to the composable function in the NavGraphBuilder.
And tada, we have arrived at our destination!🎉
Back to our code
Alright, we’re done with our small interlude, let’s get back to our code! In our case, we haven’t specified any navigation options when navigating — we just call navigate with the route.
By default, the previous destination (our FeedScreen destination) will be kept on the back stack. When we want to go back from our AdoptionScreen, we just have to pop that destination off the back stack.
Instead of defining where we want to go, we tell the NavController that the destination at the adopt route is the topmost destination that should be popped off the back stack by also setting inclusive to true. Note that this is the default behavior for popBackStack, so we could also just call navController.popBackStack() without any arguments. This way, we could navigate to the adopt route from anywhere and always go back to the place we came from. Alternatively, we could also use navController.navigateUp() here. It attempts to navigate up in the navigation hierarchy. In most cases, that means just popping the current entry off the back stack, but if the app was opened through a deep link using navigateUp makes sure that you go back to the place you came from, e.g. another app.
And with that, we have our most basic form of navigation. Let’s clean up the code a bit!
Cleaning up
As you can imagine, repeating our routes everywhere we want to navigate isn’t a very scalable approach. We want to be able to re-use the routes. This will prevent us from introducing bugs with a typo and help us when we want to change our navigation logic. There are a few approaches for this, i.e. defining all routes as constants in an object (or multiple).
This is what we used at first, but I favor Chris Banes’ implementation using sealed classes by now. It is a bit easier to read and generally easier to maintain.
Kotlin 1.4 and 1.5’s relaxed rules for sealed classes allow a clean separation for these definitions and make sealed classes a great fit here.
Let’s go and update our code from earlier to use that!
Arguments
When navigating to a destination, we often want to pass an ID or another argument that is needed to load specific data. Say our FeedScreen now had a list of cute puppies up for adoption and we wanted to show the adoption page for a specific pup when it’s clicked:
Our Screen.Adopt destination doesn’t know how to handle arguments yet, so let’s jump back to our routes and add an argument first.
Arguments are defined using curly brackets that enclose the arguments’ name. We will use this name to retrieve the argument later on. The curly brackets register this as a placeholder and that this is where the argument is expected when the route is created.
Of course, the format of the route is completely up to you, but it makes sense to follow RESTful URL design. Think of the route as the identifier for the screen. It should be unique, clear and easy to understand.
For required arguments, define the arguments as path parameters. For our Adopt route, we always require the dogId to be present so we define it as a parameter of the path. If we wanted to supply optional arguments we would use the query parameter syntax: adopt?dogId={dogId}.
Going back to our nav graph builder, the @Composable lambda that the compose function takes a parameter: The NavBackStackEntry of the destination. A NavBackStackEntry holds, among other important information, the arguments extracted from the route that is being navigated to.
From the back stack entry, we can extract the dogId we declared as an argument in the route. Note that the entry’s arguments are nullable, but we can be sure that this data is here as it is part of the route we defined. When navigating, the requested route has to match a destination’s route or its pattern exactly. Since our dogId argument is part of the route, we can’t get into the sticky situation of this argument being missing. It is still a good practice to think about handling this case though and not to sweep it under the rug with a simple non-null assertion.
Now that we have our nav destination set up, we can add the argument to our navigate call in the feed! To do that, we have to modify the route that we want to navigate to. We were previously using Screen.Adopt as route but since updated this route to be the template so we can’t add our argument here. Instead, we can create a createRoute function with the needed parameters that will build the route. Full credit to Chris Banes for this idea!
You can find more information on navigating with arguments, optional arguments and argument types other than strings in the official Android Developers documentation.
Co-locating our navigate calls
Cool, everything looks great and works well, right? Well… for the first few screens. As our app becomes more complex, we’ll want to navigate to one destination from more than one place. We end up passing down the NavController to at least each screen-level composable. This creates a dependency between the composable and the NavController, making it harder to test and create @Previews for. The navigation-compose testing guidelines also state this:
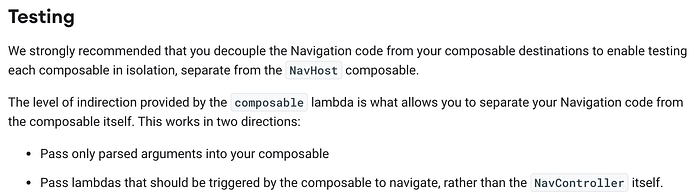
Apart from testing, it also makes changing our navigation logic harder. If we were navigating to our adoption screen from 5 different places, each calling navController.navigate , we would have an at best annoying and at worst hard and bug-inducing time updating this destination’s arguments if we wanted to add one or change the navigation logic in another way like popping the back stack. The magical phrase is “co-location of navigate calls” — we want to make sure that all our navigate calls live in one place instead of being splattered around 30 different composables.
Updating our code, instead of passing the NavController to FeedScreen and AdoptionScreen, we can change them to accept a lambda instead:
After that, we update our CuteDogPicturesApp to pass down that lambda instead.
This way, we have decoupled our composable from actual navigation dependencies, can easily fake this behavior and easily refactor it later on. If we wanted to, we could even extract the actual navigate call into a local function. As different destinations might require different navigation logic (you might want to pop the back stack when you are navigating from screen B to C, but not when navigating from A to C) I recommend holding off on this (most likely) premature optimization. Through the co-location of your navigate calls you already have a good starting place if you want to extract even more things later on.
Nested Navigation Graphs
Using nested navigation graphs, we can group a set of destinations and modularize it. If you used the nav component before, you will probably know the <navigation> XML tag which could be used to declare a nested navigation graph. With the Navigation DSL, there is a navigation extension function similar to the composable extensions that navigation-compose provides. This navigation extension function is provided by the common (non-compose-specific) navigation artefact.
To declare a nested graph, we call the navigation method with the route of this nested graph so that it can be navigated to and also set the start destination. We have also introduced a DogScreen sealed class that represents the routes in this graph. The Screen sealed class now represents top-level destinations while nested destinations are defined in their own sealed classes. This makes the code easier to read and maintain as more destinations get added. We could also move the DogScreen class into its own file for more separation!
Extracting Navigation Graphs
As your app grows, so will your navigation graph. Eventually, you will need nested navigation and end up with a very long navigation graph definition that is hard to read and maintain.
Since the composable and navigation functions are just extensions on NavGraphBuilder, we can also use extension functions to break up our navigation graph:
As our navigation graph grows, these can be hosted in their own respective files too to make things easier to work with. If your app is modularized, this also enables you to encapsulate the navigation and routes for a module within that module. For our example, that’d mean exposing the addFeedGraph extension function from the dog module. To navigate outside of this nested graph, addFeedGraph would also accept a lambda to navigate to the adopt screen.
If you are interested in modularization, I highly recommend Joe Birch’s article about modularized navigation in Compose!
Lessons from the real world
At Snapp Mobile, we are currently working with a technologically progressive customer that asked us to deploy Jetpack Compose in a greenfield project. We have used Compose and navigation-compose for a few months there now and from our experience, following the above best practices is the most important.
Before reading the official advice on decoupling composables from the NavController we were passing it down to all of our screen-level composables and created tight coupling between composables and the navigation library. Coming from using the navigation library with Fragments (sorry, Jake) and Activities, we were used to calling findNavController in our Fragments as we didn’t have any abstraction previously. Passing down the NavController was the “natural” way at first, but as the code base and navigation graphs grew it became obvious that it led to messy code that’s hard to change — we are still working on undoing that damage.
If you are just starting with navigation-compose , follow this best practice. If you have already been using it for a bit I suggest starting to think about ways to refactor this code as soon as possible to reduce the number of things you have to update. Chris Banes refactored his TiVi app’s navigation to co-locate navigate calls recently if you are looking for inspiration.
Properly defining routes and navigation graphs and splitting them up is another important point. As pointed out earlier, we started out defining our routes in (nested) objects which became very hard to manage and is also not the most pleasant thing to refactor later on. Leveraging sealed classes and their relaxed rules in the latest Kotlin versions is important to be able to keep an overview of things. Thinking about an app with 40+ navigation destinations, defining all routes in one place will end up in a quite big, hard-to-read and unmaintainable file.
But what about transitions?
As of Navigation 2.4.0-alpha02, transitions between composable destinations are not supported yet. We haven’t needed it in our current project (yet), but if transitions between destinations are a requirement this is good to keep in mind when making a decision about navigation-compose in your project. However, the compose animation and navigation teams are working on the issue and we should see something out when navigation 2.4.0 goes stable. Meanwhile, I recommend tracking this issue.
Apart from these three gotchas, while we encountered the occasional bug or two, navigation-compose works very well and we are using it and its Hilt integration and are happy. As with all new things, we are still in the process of figuring out new best practices but are happy with our approach so far. Navigation 2.4.0 also landed support for multiple back stacks and fixed a ton of other bugs, so seeing the team actively work on requested features has been great!
Resources
You’ve made it to the end! Congrats! Even though some contents are similar, check out the official Android Developers documentation about navigation-compose. Chris’ pull request in Tivi is a good example of migrating away from bad navigation patterns. The Tivi repository itself is a good reference for implementing navigation using navigation-compose in a real-world app too if you want to get some inspiration.
The official navigation samples are a good starting point too, but keep in mind that they are just that: samples. They don’t necessarily follow all best practices (like not passing down your NavController), so take these with a grain of salt and don’t blindly copy them.
Apart from the official resources, there are also some cool community projects for navigation in Compose. While we haven’t used these in production, I’ve heard other people say that they like these libraries. It’s definitely worth checking out Zsolt Kocsi’s compose-router, Zach Klippenstein’s compose-backstack and Arkadii Ivanov’s Decompose libraries.
Have you used navigation-compose? I’d love to hear about your real-world experiences!
Thanks to Volodymyr Galandzij, Mark Dickson, ashdavies ™ and Ian Lake for their lovely suggestions and reviews!